If you think cropping photos is as simple as cutting parts of your image, then you’re absolutely wrong. Cropping images is more than just reducing the image size or removing unwanted areas in the photo. Professional photographers, magazine editors, and publishers crop images to highlight the subject, enhance a print layout, or tell a powerful story.
Let’s suppose you’ve just returned from a three-day vacation. As soon as you got home, you checked all your photos: some need to be labeled, some might need enhancement, but some look so much better with some cropping.
Our feature-rich photo editor Cut Paste Photos Pro is equipped with an image cropper that lets you cut your photo professionally and aesthetically. In this tutorial, we will teach you how to use Cut Paste Photos Professional image cropper. You’ll be surprised to learn how easy it is!
Cut Paste Photos Pro Crop Tools
Crop Shape
The Crop Shape tool lets you cut your photo into different shapes. With this tool, you can crop your photo in shapes like square, circle, triangle, star, heart, or pentagon.
Free Hand
The Free Hand tool allows you to manually select the area in your image you want to crop. This easy-to-use cropping tool lets you cut any photo down to size to reframe your photo or balance your designs beautifully.
With this tool, you’ll be able to crop your photo easily. You simply have to draw around the part of the picture you want to keep. Everything outside the area you select will be cropped or cut off.
If you need to crop a very little detail in the photo, you can zoom in on the area of the image, then draw around the part you want to crop.
Once you’ve selected an area in your photo, click “Cut Out Selection”. If you want everything outside the area you selected to be cut off, select “Inverse Selection”, then “Cut Out Selection.”
Quick Selection Tool
The Quick Selection Tool is a very handy tool that lets you crop your photo easily and yet, still, beautifully. If you want to remove the background of an image, use the Quick Selection tool to select the background, then tap “Cut Out Selection.”
This is the best tool to place your subjects in a more please, non-distracting environment. The Quick Selection tool allows you to cut your subjects out of the background and isolate them or use them as a layer on top of another photo.
Eraser Tool
The Eraser tool lets you straighten your photo by easily removing portions of a photo to create focus. It’s easy and non-destructive. It is basically a brush which erases pixels as you brush it across your photo. The pixels are erased to transparency.
How to Use the Image Cropper
If you haven’t downloaded Cut Paste Photos Pro yet, you may get it here. Our powerful app can be installed on iOS devices running iOS 10.0 or later.
1. Select your image
Once you have the app installed, open it, and sign up for free to get exclusive offers and updates. Choose a photo to cut. You may select a photo that’s already in your Library (tap: Choose from Library) or take a photo directly from the app to cut (select: Take a Picture).
For this tutorial, we’re going to crop an image from the Library. Once you’ve selected a photo, you’ll be directed to the next editing phase.
2. Crop your photo
The Crop Shape tool lets you cut your photo into a specific shape, including square, circle, triangle, star, heart, and pentagon. The shapes let you crop your photo creatively, so you can make it more personal. For example, if you want a photo of you and your loved one, you can use the Heart shape crop tool to highlight you and your spouse within a heart.
Or, you could use a photo of your child and use the Star-shaped crop tool. Indeed, you can have fun with the Crop Shape tool.
If you want to keep it basic, you can crop the images normally by dragging the edges of the crop selector. Use the grid lines as your guide when cropping your photo.
Use the other crop tools as you see fit. If you want to remove the background to isolate your subject, you may use the Free-Hand tool, Quick Selection tool, or the Eraser tool.
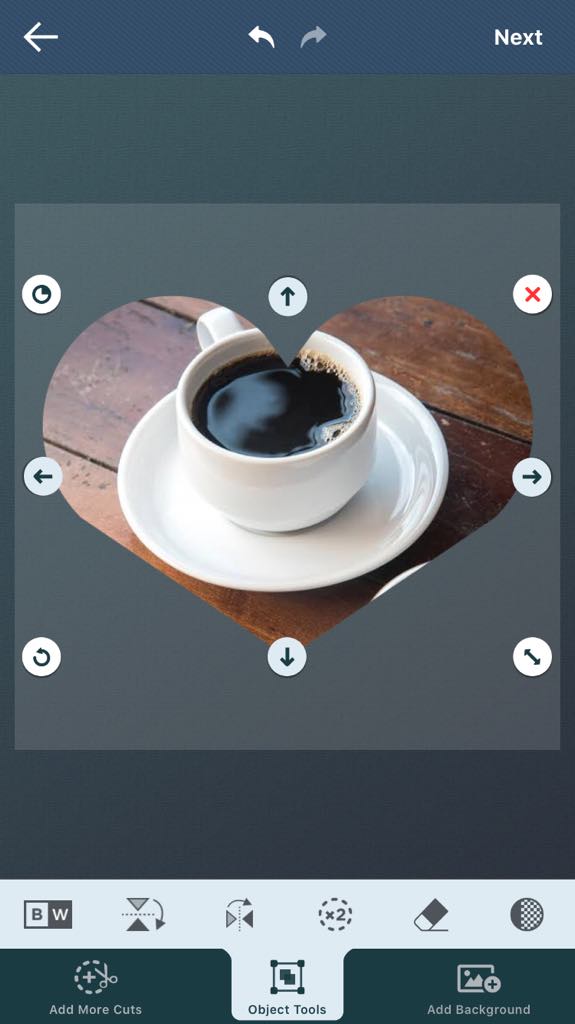
3. Add more cuts, background, or use the Object Tools
After cropping an image, you will be directed to the second editing phase. Here you will see these options: Add More Cuts, Object Tools, and Add Background.
Use the Object tool to edit your photo. You may turn your photo into black and white, flip it horizontally or vertically, or duplicate. The Add More Cuts option lets you add another PNG image, while the Add Background allows you to add another image as background in your canvas.
4. Add effects, stickers, text, blur, and more
The next editing phase lets you add fun and customization in your photo. Add texts, stickers, emojis, and other effects. You may also use the Blur Tool to put the focus on your subject. To learn about how to use the Blur Tool, read our tutorial Emphasizing a Photo Using a Blur Tool.
You may also enhance the tone of your image to achieve balance or to make the photo more vivid. Use the Tone Curve tool to adjust the color tone of the image.
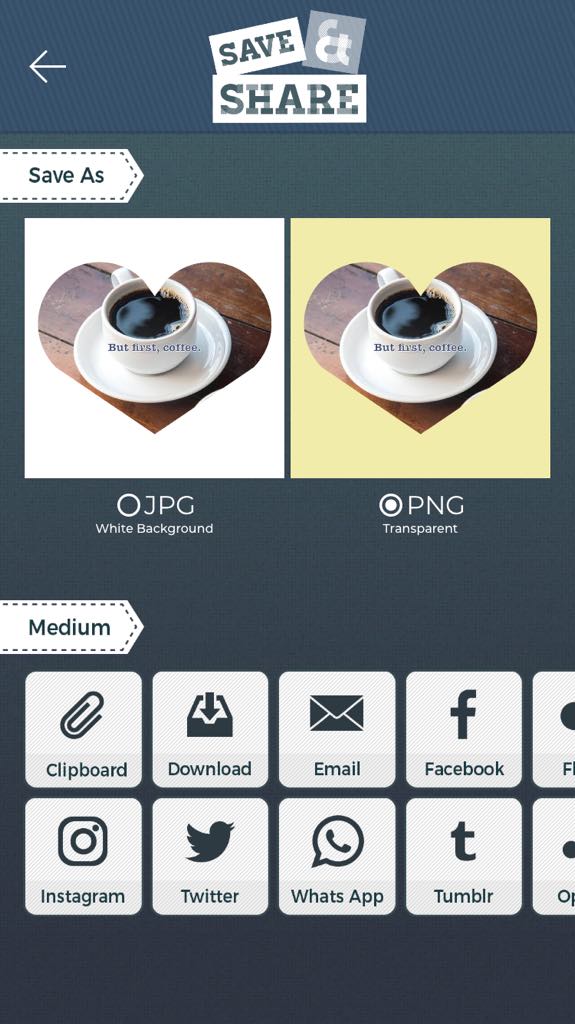
5. Save your image or share
Once done adding final touches to your photo, tap the ✓ on the top left corner. You will be asked whether to add animated effects on your photo or not. Tap Yes, then you’ll be directed to the Animation Editor, where you can add preloaded animation effects on your photo for free.
Tap No, then you will be directed to the Save and Share. You may choose to save your photo as JPG or PNG.
You may also share your photo to your social media accounts, as an email, or as a message directly from the app.
Why Crop Your Photos
Cropping isn’t just about cutting off an area of your photo. Remember, a picture is worth a thousand words, and the crop tool is what will give you the power to turn those thousand words into a wonderful story.
You don’t want to cut away any important details in your image that might change the entire story or alter the message you really want to express. The crop tool is a powerful story-teller.
For example, the image below shows a dog catching a ball. If you cut away the ball, it would look like the dog is just making a funny face.
BEFORE
AFTER
Use the crop tool to remove unnecessary details in your photo. Check the images below as an example:
BEFORE
AFTER
Tips for Cropping Photos
When cropping photos, make sure not to cut off any limbs. For example, check out this woman doing yoga.
DO:
DON’T
The second photo won’t make any sense and removes what really is being expressed in the photo.
Also, if you want to crop a portrait and center your subject, make sure to apply the rule of thirds. Make sure the eye level of the subject is one third down the canvas.
DO:
DON’T
Conclusion
Cut Paste Photos Pro is an amazing photo-editing tool equipped with crop tools so you can cut away unimportant details from your photo. The crop tools are easy to use and do the job beautifully. With a powerful photo editor like Cut Paste Photos Pro, you don’t have to be a pro to come up with the best photo.
Related Questions
Can I add a photo on top of another photo using the Cut Paste Photos app?
Yes. Select a photo from your Library, then use the Add Background tool to add another image in your canvas.
Are all the editing tools in the Cut Paste Photos app free?
The Cut Paste Photos app offers free tools you can use anytime. You can do more with the app and unlock amazing features by subscribing.