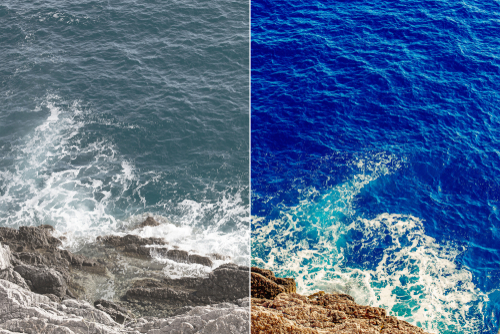
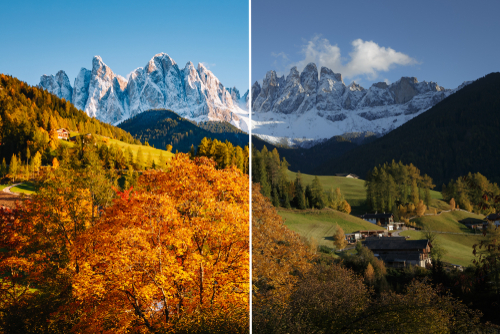
Learn how to adjust cropped images by performing these three easy steps on your iOS device using the Cut Paste Photos Pro app.
Done watching that quick tutorial?
Now let’s learn more about how to adjust cropped images and create amazing outcomes in three easy steps:
How To Crop Your Images
Since this article discusses how to adjust cropped images, we’ll have to learn how to crop first. This is a good thing because cropping photos is a great way to improve your image’s composition.

This is one of the most basic things you can do with the Cut Paste Photos Pro app.
Here’s a short tutorial on how to do that:
- Launch the Cut Paste Photos Pro App.
- You’ll have two options, “Take a Photo” or “Choose from Library”
- If you chose “Take a Photo” you can take a picture of an image and upload it in your library.
- If you chose “Choose from Library”, your All Photos gallery will open up where you can choose the image you want to edit.
- Additionally, you can transfer images taken with other devices into your mobile device so it is included in your internal library
- Tap the image you want to edit and wait for it to load
- Next, at the bottom of the screen you’ll find the options “Crop Shape”, “Free Hand”, “Quick Selection”, and “Eraser”.
- Crop Shape will give you the basic shapes to crop your image with such as squares, circles, triangles, stars, hearts, or hexagons. These shapes can be adjusted to the desired size to include the entire image you want to crop.
- Free Hand gives you the options “Normal” and “Magnifier”. For the Free Hand option, all you have to do is trace the outline of the image you want to crop.
- The “Normal” option lets you view the image as is while you choose the image to cut.
- The “Magnifier” option enlarges the immediate area where your fingertip rests on the screen.
- Once you’ve selected the entire area you want to cut, click on “Cut Out Selection”—this will leave the contents of the area you selected
NOTE:
Clicking on “Inverse Selection”, leaves you with the outer part of the image or the image outside the perimeter of what you initially selected.
- Click on “Next” option found at the upper right corner of the screen
- Once you’re satisfied, click “Done”. This saves your project as a finished image.
Learn more on how to crop your images here:
How To Use Cut Paste Photos Professional Image Cropper
Adjust Your Cropped Image’s Saturation Level Here
Adjust cropped images further by working on the saturation level. Saturation refers to how colorful the image is relative to its own brightness.

With the Cut Paste Photos Pro app, you can increase or decrease the saturation level by dragging the cursor across the slider.
- Launch the Cut Paste Photos Pro App.
- Click on “Choose from Library”, and your “All Photos” gallery will open up.
- Tap the cropped image you want to edit and wait for it to load.
- Click on Next.
- At the bottom, you’ll find the Saturation level slider. It has the paintbrush icon.
- Sliding the cursor to the left decreases the saturation level.
- Sliding the cursor to the right increases the saturation level.
- Click on the Check button at the top right section once you’re satisfied with the saturation level.
- Click on “Done” to save your finished project.
Adjust Your Cropped Image’s Contrast Level Here
Adjust cropped images further by working on the contrast level. Contrast refers to the lightness and darkness of the image as a whole.

With the Cut Paste Photos Pro app, you can increase or decrease the contrast level by dragging the cursor along the slider.
- Launch the Cut Paste Photos Pro App.
- Click on “Choose from Library”, and your “All Photos” gallery will open up
- Tap the cropped image you want to edit and wait for it to load
- Click on Next
- At the right side of the screen, you’ll find the Contrast level slider. It has a circle divided in two with black on one side and white on the other.
- Sliding the cursor down decreases the contrast level
- Sliding the cursor up increases the contrast level
- Click on the Check button at the top right section once you’re satisfied with the contrast level.
- Click on “Done” to save your finished project.
Adjust Your Cropped Image’s Brightness Level Here
Adjust cropped images further by working on the brightness level here. Brightness refers to the overall illumination level of the image. Editing your image’s brightness can help bring the focus to the forefront. This is great if you want to make your photo less cluttered and more professional looking.

With the Cut Paste Photos Pro app, you can increase or decrease the brightness level by dragging the cursor along the slider.
- Launch the Cut Paste Photos Pro App.
- Click on “Choose from Library”, and your All Photos gallery will open up
- Tap the cropped image you want to edit and wait for it to load
- Click on Next
- At the left side of the screen, you’ll find the Brightness level slider. It has a symbol that looks like a simple sun.
- Sliding the cursor down decreases the brightness level
- Sliding the cursor up increases the brightness level
- Click on the Check button at the top right section once you’re satisfied with the brightness level.
- Click on “Done” to save your finished project.
Note: You can also perform all three easy steps together before clicking on the Check button to adjust cropped images and further enhance it.
Aside from these three easy steps to adjust cropped images, you can also add filters, add stickers, texts, draw something, add a splash of color, resize the image, and do more adjustments if you want before clicking on Done.
That’s it.
You’re done.
Want To Learn More?
We have more tutorials for you to learn more about the Cut Paste Photos Pro app. This app is so easy! Having more knowledge on how to use it properly will only help you create more stunning images! That’s always a good thing for you and everyone else, right?
Conclusion
You don’t need the entire toolbar to adjust cropped images and get great results. All you need are these three easy steps and you’re basically done. You can edit using any one of the three or use all three to complement one another to make your raw image pop out and look more amazing.

So make your photos more interesting by learning how to adjust cropped images by performing these three easy steps. Download the Cut Paste Photos Pro app now!
Related Questions
What Is Saturation?
Saturation refers to how colorful the image is relative to its brightness. This is crucial when you adjust cropped images. Increasing or decreasing the saturation level either raises the dominant color’s presence or flattens the curve to include the far ends of the color spectrum respectively.
What Is Contrast?
Contrast is the difference in luminance or color that makes an object distinguishable. Understanding how this works is extremely important when you adjust cropped images. Increasing the contrast makes the object pop out more while decreasing it makes it blend with the background better. Use this feature to bring the focal point where it really matters.
What Is Brightness?
Brightness is self-explanatory. The Cut Paste Photos Pro app is a versatile tool that anyone can truly benefit from once you familiarize yourself with all the useful features. Brightness makes the difference when you adjust cropped images because it brings out more details by highlighting the dark areas. You could see objects previously hidden when the photo was still dark.
